|
|
A professional manufacturer of three-dimensional measuring devices for the on-machine measurement and in-machine measurement |
| For the adjustment of the stylus please refer to Q3 below. | |
|
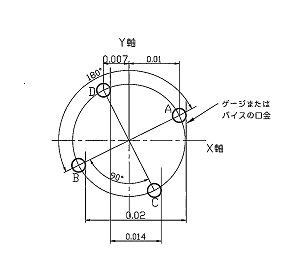
Please download the figure below when actually confirming the amount of runout.
It is easy to understand by writing measured values on the X and Y axes of the figure.
Please stop the point finder attached to the machine at the main spindle fixed position [orientation position]. |
|
|
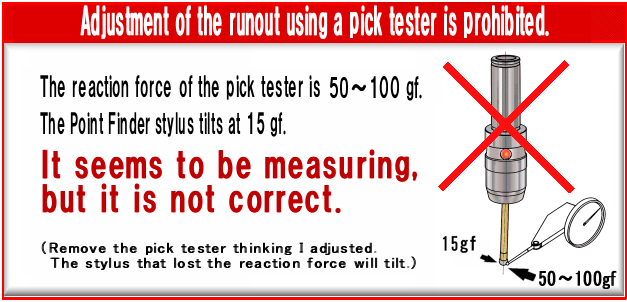
Point finder and centering gauge The swing type is a measuring instrument.Please check the correction value and repeat accuracy before use (This is called initial setting) We can measure at ± 1 μm even if the runout is large. Adjustment of stylus using a pick tester is strictly prohibited.  Pick tester's reaction force is 1N (100 gf) The point finder tilts with 0.15N (15 gf). It seems to be measuring, but it is only looking at the balance of the spring. |
|
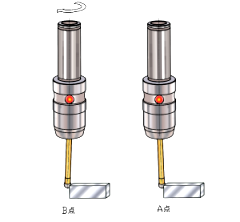
  [Please see the diagram on the right and we explain the theory to you.] I will explain the principle of the figure below.
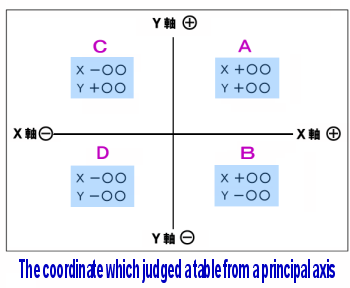
   By doing this measurement in the same direction as the measurement on the X axis, the correction value on the Y axis can be obtained. The position of 1/2 of the movement distance of the X axis is the correction value of the Y axis. ※In actual measurement, be sure to perform the main spindle at the orienteering position.Input the value of X axis and Y axis to the offset of the machining center. Please fill out the form so that you do not mistake [+ rotation or - rotation]. If it is a machining center with "+ input (FANUC)" or "write (okuma)" function, the correction value of the coordinate of the end face is automatically entered when pressing the button when at the LED lights up.e end surface coordinate is automatically corrected. ※1 chattering phenomenon |
|
| Products that are relevant to this question is as follows. It will jump to the corresponding page by clicking. [Non-magnetic stylus] |


 Nissin Sangyo Co., Ltd. ―Measuring Instruments for The Machine Tools―