
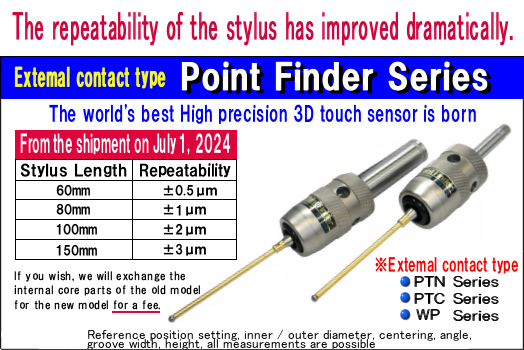


- Features / Measuring Method
- Specifications / Dimensions
Features of the Point Finder Series
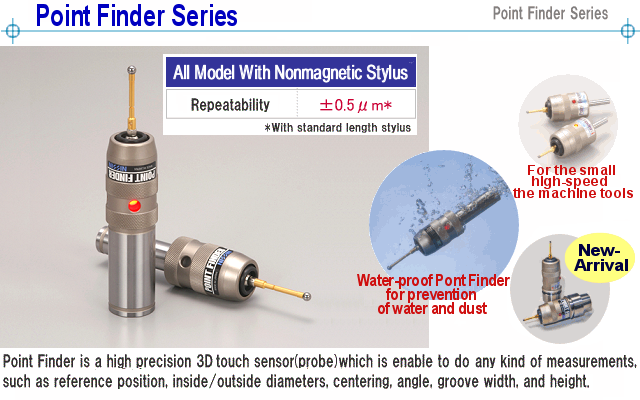
・High precision 3D touch sensor (probe) 'Point Finder series' is enable to do any kind of measurements such as reference position, inside/outside diameters, centering, angle, groove width, and height.For the ultrahigh-precision 3D touch sensor → 【Centering Gauge Swing Type】
・Safety design enables the stylus swing toward X, Y and Z-axes directions and prevents the Point Finder itself from breakage.
・Four LEDs light up when the stylus touches to a workpiece.
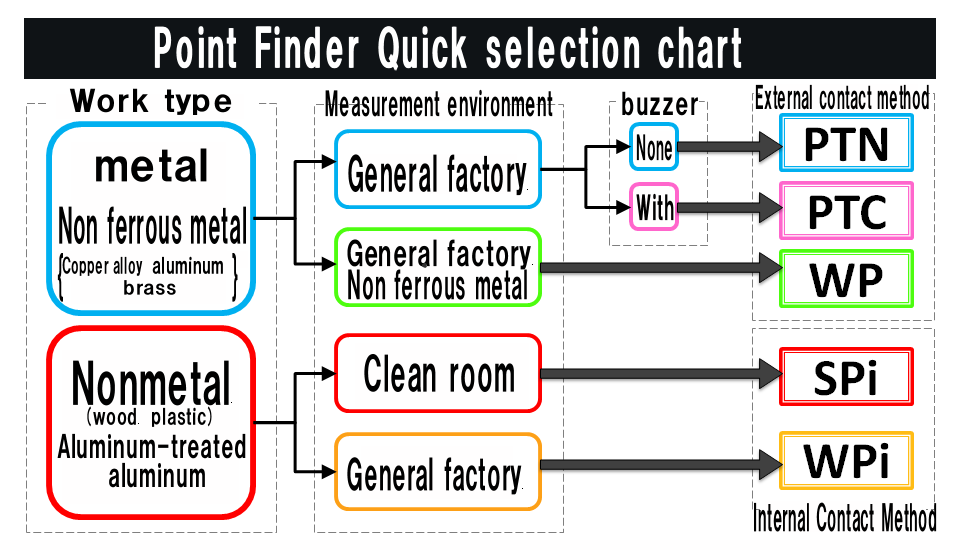
・As for PTC (Point finder with a buzzer), three LEDs light up and the buzzer let you know when the stylus touches to a workpiece.
・With nonmagnetic stylus, magnetic force doesn't affect to the measuring.
→ Check the details of 【Nonmagnetic Stylus】
・Waterproof IP 67 (IEC standard) will not enter water even if it is immersed in 1 m of deep for 30 minutes.
(We use fluororubber for our products, but some cutting fluid contain surfactant dissolves fluororubber, and our company prohibits its use.)

| Point Finder [External Contact Type] |
Point Finder-i [Internal Contact Type] |
|||
|---|---|---|---|---|
| iron, nonferrous metal | Measurable material | metal, nonmetal (plastic, wood...) | ||
| XY-axes | ±11.5mm | Stylus stroke | XY-axes | ±6mm |
| Z-axis | +5mm | Z-axis | +5mm | |
| 60㎜ Mounting ±0.5μm 80㎜ Mounting ±1μm 100㎜ Mounting ±2μm 150㎜ Mounting ±3μm |
Repeatability (*1) | ±0.5μm | ||
| XY-axes | 0.001N | Measuring pressure | XY-axes | 0.3N |
| Z-axis | 0.001N | Z-axis | 1.5N | |
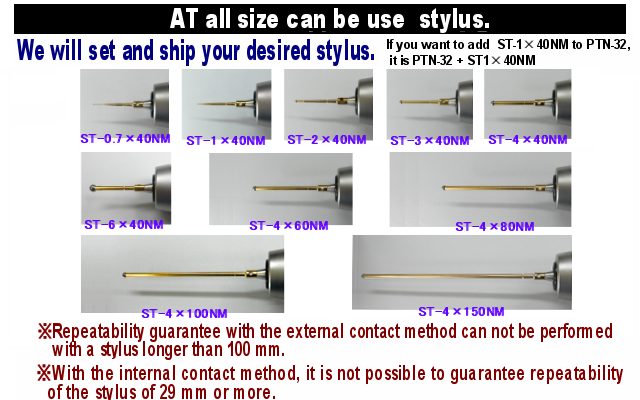
| φ1、φ2、φ3、φ4、φ6 | Stylus tip diameter | φ2、φ3、φ6 | ||
| ST-4×40NM(*2) | Standard stylus | ST-6×29NM(*2)(*3) | ||
| PTC series has a buzzer | Other feature | available to MC with a ceramic spindle | ||

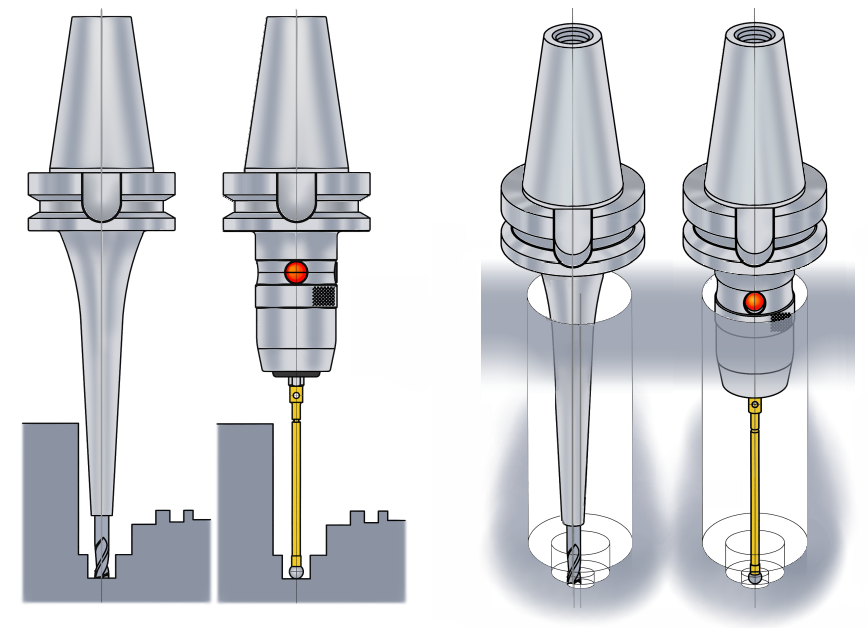
How to Measure
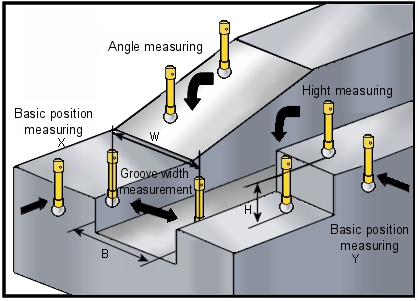
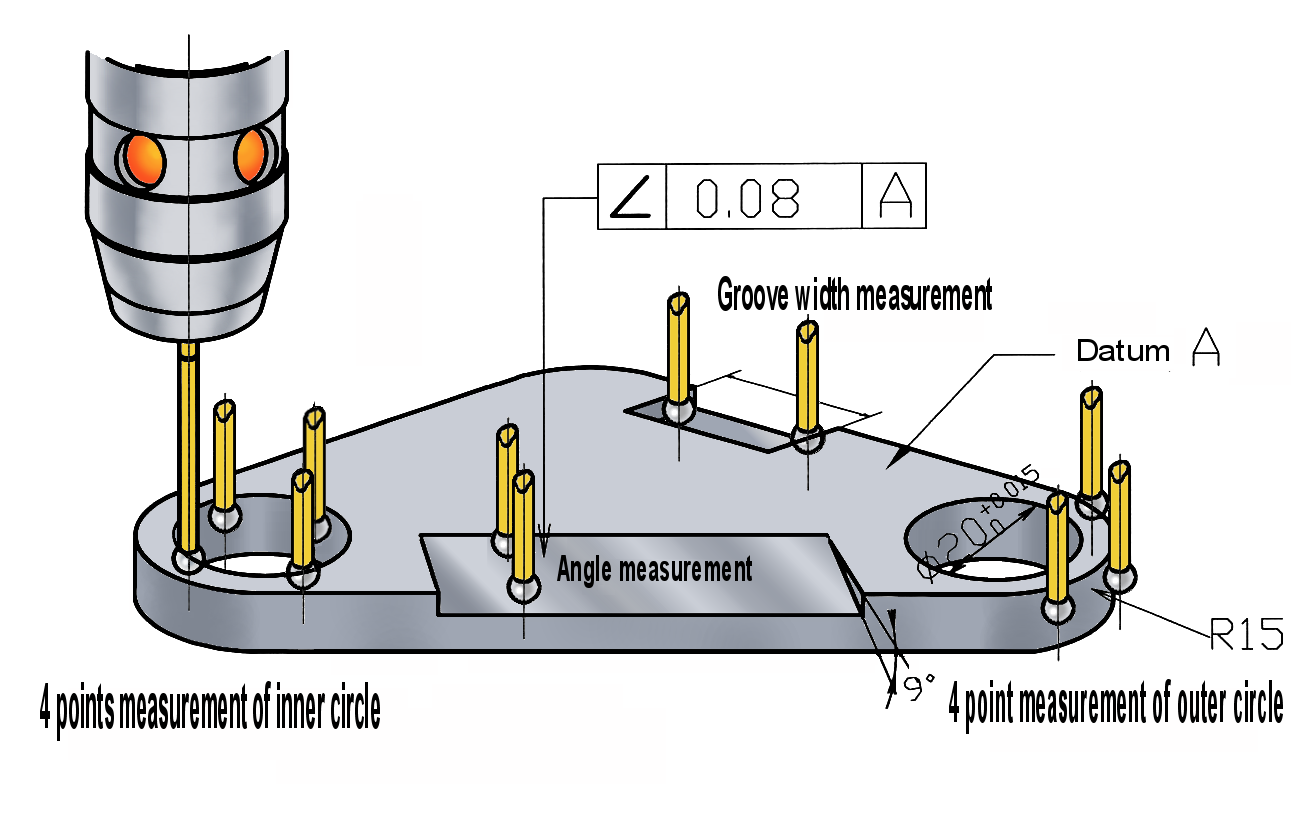
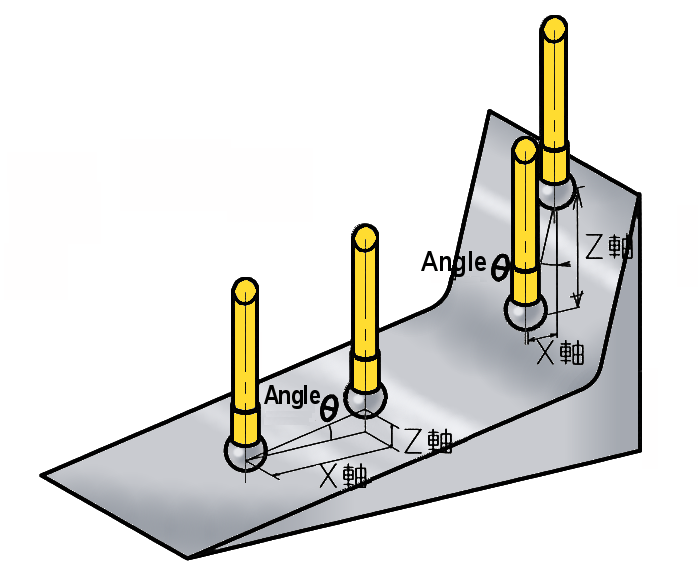


↓ <*Document>The permeability measurement data of the nonmagnetic stylus is here. ↓
 Permeability measurement report
 Permeability measurement data






 Nissin Sangyo Co., Ltd. ―Measuring Instruments for The Machine Tools―